Showing posts with label crafts. Show all posts

Wednesday, June 24, 2015

DIY Birthday Candles


Materials


Instructions
1. For each candle, cut out 4 of the same letter from beeswax sheets using cookie cutters and make 2 stacks of 2 letters.  Soften the  wax slightly using a hair dryer on low.

2. Press a toothpick vertically into 1 stack, and then press a small strip of the candlewick above the toothpick.

3. Sandwich the toothpick and wick between the two stacks of wax; press to join the stacks of letters together.

4. Light your candles up and get ready to make someone's day :-)


Friday, November 7, 2014

Halloween 2014 - DIY Mug Shot Backdrop

OF ALL THE HOLIDAYS, Halloween is without a doubt my favorite.  It wasn't even September and I already started decorating the house.  I didn't get to take pictures of all the goodies I made (and there were lots) but you can trust it was an intoxicating-ly good time.  I did manage to take a few photos early in the night of guests posing in front of an easy-to-make photo backdrop.


Here's what you'll need to make your own:

  • Large poster paper (I used photo backdrop paper because I work with a photographer who uses this) -- you'll want to put together or cut a 5 ' x 5' piece, if not larger.
  • Black duct tape
  • Print outs of the numbers 3-7 (download font here)
  • Red acrylic paint for "blood" splatter (I used this)


Instructions:

  1. Measure 1' from bottom of the paper and place a 1' piece of duct tape from the right edge of the poster paper.  Paste the 3' cut out onto the sheet and place another long strip of duct tape from the number to the left edge.
  2. Repeat step 1 for numbers 4 - 7.
  3. Using a medium sized brush, splatter red paint across the paper.
  4. Optional: find chalk and a mini chalkboard from your local craft store to use as a mugshot placard.


From top left to bottom right: B. Spears, Alex from Clockwork Orange with Cactus man, Raoul Duke from Fear and Loathing in Las Vegas with Suzy Bishop from Moonrise Kingdom, and Whoopee Cushion


Sunday, March 25, 2012

Honey, I Love You


I
NSPIRED BY a card my coworker picked up for her boyfriend, I took this rainy weekend as an opportunity to create a handmade rendition for my honey. I didn't give it to him for any special occasion but it's a cute anniversary, Valentine's Day, or just because card! I put ours up on the fridge next to our goofy photobooth pictures.

What you'll need for this project: gold glitter, Elmer's glue, a paintbrush, a blank card, a metallic gold pen, a toothpick, and a steady hand! First, lightly sketch the shape of the honey bear in the center of your card with a pencil. Using a paintbrush, carefully cover the bear with Elmer's glue, making sure not to spread any outside of the lines.


Spread glitter over the glue and dust away excess glitter to reveal a gold bear. With a toothpick, carefully remove spots for bear's eyes and nose. Use a black pen to create the bear's eyes and nose. With a metallic gold pen, write your message underneath the bear. Then present to your honey! :)

xo,
Margaret

Monday, April 25, 2011

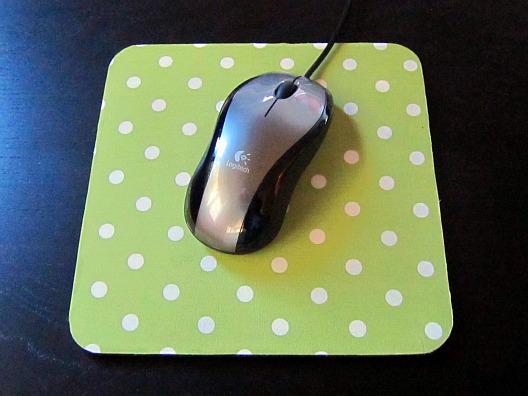
Monday Makeover: Mousepads!

GETTING CRAFTY is one of my favorite things to do on the weekend when it's bleak and weary outside. My company moved to a new office recently and everything was so shiny+new that my mousepad looked weathered in comparison. I got it over 10 years when I won an art contest so it was definitely time to update it!

Here's what you need to get started on your own:

MATERIALS
- An old mouse pad (Ikea has some good basic ones for just $1 each.)
- Fabric*
- Fray check*
- Heat n' Bond*
*all available from your local craft store.

DIRECTIONS
1. Trace the mousepad onto your fabric, and cut a 1/2 inch of extra fabric around the traced shape.
2. Put the side of the fabric with the print face down, and put Heat n' Bond on it with the paper side up.
3. Iron for 10 seconds until bonded and remove paper backing from fabric when done.
4. Place fabric on mouse pad right side up and iron over fabric until bonded.
5. Trim extra fabric with good scissors and use Fray Check to make sure there are no loose threads.

... And voilĂ ! Five steps later you have a pretty cheap, pretty easy, and pretty new mousepad.


From drab to fab.

Have fun!
Margaret